As we all know, Oracle has put virtually all of their development efforts into the cloud. As a result, Oracle Cloud EPM keeps getting great new features that we may never see in on-premise Hyperion Planning, even with the fabled release of 11.2. So what new functionality has been added to Oracle Cloud EPM that will likely never make it to on-premise Hyperion Planning? Let’s compare Oracle Cloud EPM vs Hyperion Planning.
Hybrid Essbase
You might be thinking…we already have Hybrid Essbase for On-Premises Hyperion Planning. And while technically that may be a true statement, it isn’t technically supported by Oracle. That isn’t to say that we don’t use it anyway, but it isn’t actually supported. And aside from that, it should noted that the version of Hybrid Essbase in the cloud is far, far more advanced than what we have been using in On-Premises. With the addition of 21C support, that has changed a bit, but at the end of the day, the cloud version of Hybrid is a game changer for EPM applications. We can even make use of the dynamic aggregations in business rules now! When comparing Cloud vs Hyperion Planning, this is a major advantage for so many reasons, the least of which will be a reduction in ASO reporting cubes.
Hyperion Planning has existed for over 15 years now, so you might think that the form design capabilities would be fully-baked by now. For the most part, this is a true statement. But, there have been some pretty big holes that Oracle Cloud EPM has finally filled. Two new additions in particular make for a better form design experience for developers: Exclusions and Ranges.
Exclusions
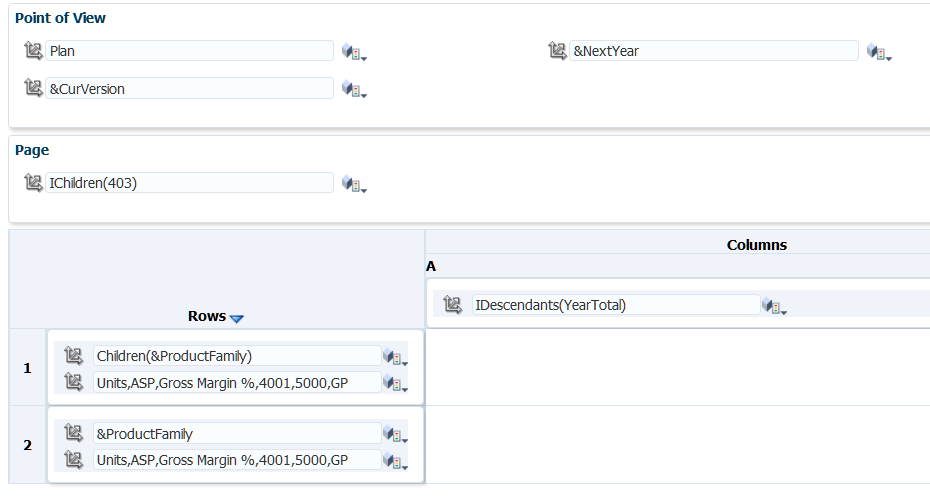
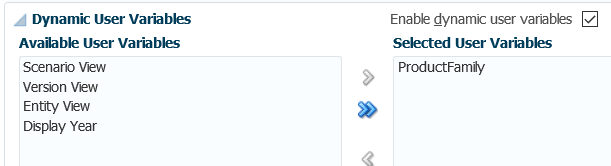
In Planning, when we attempt to select members, that’s the only option…select members. In Oracle Cloud EPM, they have added the ability to edit the selection (our old select members option) and the ability to add exclusions. Exclusions give us an easy way to take, for example, inclusive descendants of our entity dimension while excluding a specific list. This is particularly useful when we are referencing a substitution variable or a user variable. We don’t know the full extent of what could be returns, but we do know what we definitely don’t want.
Ranges
When you do monthly forecasting, nothing has been more annoying in form design than the inability to easy specify a range of members. In Planning, I can’t just ask the form to give me Jan through &CurrentMonth in one column and &CurrentMonth through Dec in another column. This means to really make my forms dynamic, I need more substitution variables than I’m comfortable with and a form that has a ton of columns with the combinations. In Oracle Cloud EPM, I now have four new member selection functions that allow me to put together a range:
- Left Siblings
- Left Sibling (inc)
- Right Siblings
- Right Siblings (inc)
Finally! I can do a range of members with just two columns and a single substitution variable!
We can now format our forms! You can change colors, font styles, add lines, along with other formatting options.
Not to be confused with regular forms…we have Smart Forms. This is an exciting new feature that allows you to take an ad hoc form, add formulas, and save them to the actual form! While this is cool for a demo, I’m not necessarily a fan in practice. While it is much better than building formulas in an actual form, which is painful, it still presents a problem. Why are you doing form math? In general I try to put math back in the Essbase model rather than having formulas on multiple forms.
Period
In Planning, if I want to add periods to just a single plan type, I’m totally out of luck. The boxes are all grey and there’s no way around it. In Oracle Cloud EPM, I can now simply un-check the plan types from which I would like to exclude the member. This is a simple feature but makes a massive difference in the flexibility in our designs.
Years
For literally years (no pun intended) I’ve helped companies add and delete years from Planning applications. There are a few ways to do this, but none of them are supported or in the interface. In Oracle Cloud EPM, if I want to delete a year, I simply select the year and click the delete button. Again, this is super-simple, but so very nice to have. Additionally, if I want to add years in the past, I can now do this in the interface! Simply add the number of years you wish to add, and when Oracle Cloud EPM asks if you would like to add them to the end, click no. Now you have years years in the past. This feature is a little more obfuscated, but still pretty simple.
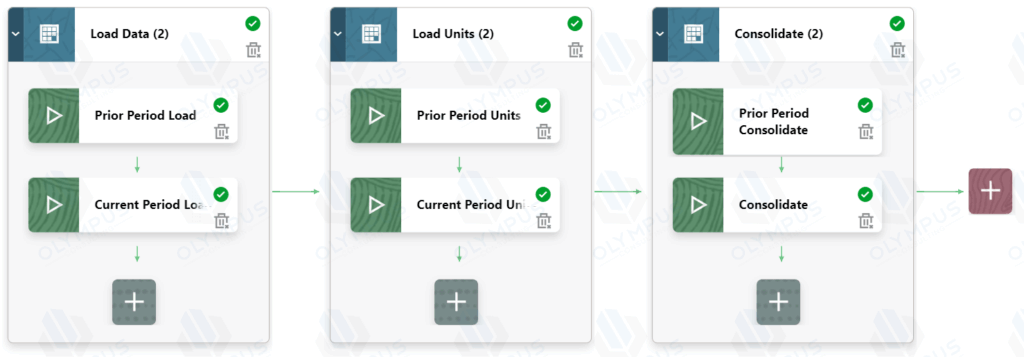
Data Maps
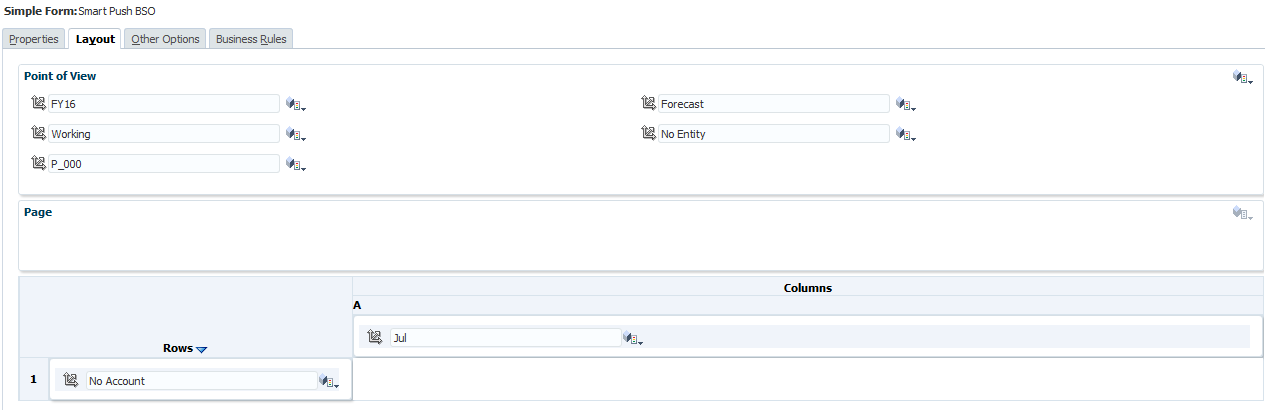
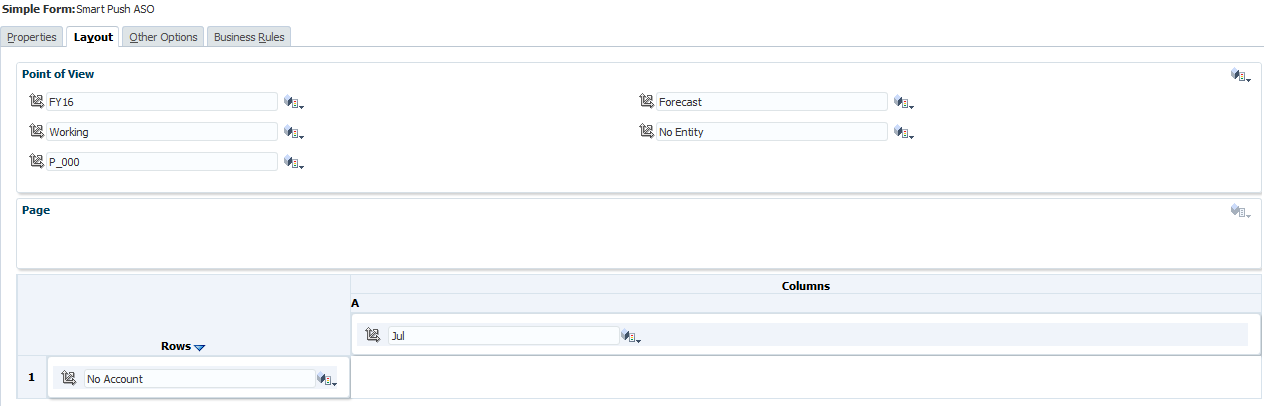
On-Premise planning does have the idea of a reporting cube and it does give you the ability to create some level of mapping. But it definitely doesn’t do what Oracle Cloud EPM does. Oracle Cloud EPM has the ability to map and move data on the fly and then it takes it a step further: Smart Push. Smart Push is one of the most amazing features that they have added to Oracle Cloud EPM. For many applications, it gives us the ability to have an ASO cube with live data from our BSO cube with no crazy partitions or really any work at all beyond the mapping. So as long as we input to our BSO cube and report from our ASO cube, I may never need to aggregate my BSO cube again.
It is fair to mention that while this functionality is not baked into Planning, if you really need it, you can build it from the ground up with some fancy scripting on the back end. Even still, it doesn’t hold a candle to the ease of use and stability of Smart Push. When it comes to data synchronization, there’s no doubt that Cloud vs Hyperion Planning has a major advantage.
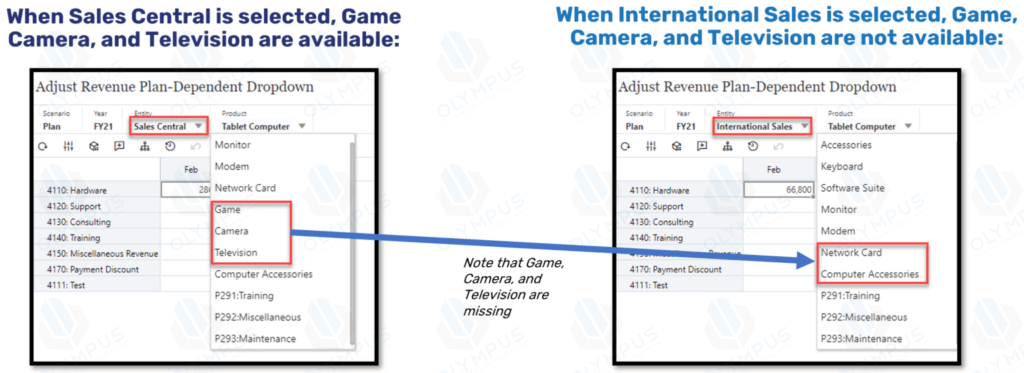
Valid Intersections and Cell-Level Security
I’ve been demoing Planning and Essbase for a very long time. When people ask what benefit Essbase might have over Planning, there are very few good answers. One of those answers however has always been that Essbase can support what we call matrix security. This is essentially the ability to allow a user to have write access to a cross dimensional set of intersections. For instance, for Entity A I can modify Account 1000 while for Entity B I can modify Account 2000. Planning simply doesn’t support that. I have to give a user Entity A, Entity B, Account 1000 and Account 2000. That user will be able to modify all combinations.
Oracle Cloud EPM fixes this. With valid intersections, I can create a set of intersections as defined above and limit the user’s ability to write back to invalid intersections. From a security perspective, they still have access to read but not write back data. With Cell-Level Security, we can now even keep users from reading the data. This finally gives us the Essbase parity in terms of security. I would honestly even say that we have gone beyond parity as the interface in the cloud is far superior to the classic filter management we’ve used in the past.
Smart Lists
I know what you’re thinking, Planning has Smart Lists. But Oracle Cloud EPM has Smart Lists that can be dynamically created directly from a dimension. This means that I can provide the user with a list of accounts. Big deal…who cares, right? I care if I add an account. With this new functionality, when an account is added, the Smart List is updated automagically. Ok…that is a big deal. Not content with this already amazing feature, Oracle took it a step further. You can also reference the value of a Smart List in a calculation. This means that I can use the selection in a Smart List to truly manipulate data. Basically a new alias is created that references the OBJECT_ID. That OBJECT_ID is also used as the value stored in Essbase for the Smart List selection. Combined, I can easily reference the member that the Smart List is linked to. Like I said…big deal.
Attribute Dimensions
This is another item that has some support in Planning, but missed the point. I can technically add attribute dimensions to a Planning application and I can use them in a variety of ways. But the two ways I need to be able to use them are missing. They can’t be used in a form. They can’t be used in Smart View. I can technically use an Essbase connection directly and use them for analysis, but that only works on BSO and doesn’t work at all on ASO Plan Types.
Oracle Cloud EPM fixes both of these issues. I can layer in attribute dimensions easily on forms. It also fixes the Smart View issues by allowing for attribute dimension selection in the Planning Ad Hoc connector. We’ve only been asking for this in Planning for a decade. The chances seem so very slim that we actually ever see it given the last ten years.
Navigation Flows
Technically speaking, the simplified interface was available in 11.1.2.4. But I don’t think it could possibly be any worse than it is. It’s essentially there for dashboards and everything partially works. It was so bad that Oracle completely removed it from 11.2. This new interface is the only interface in Oracle Cloud EPM. It may require 100 extra clicks for a variety of administrative functions, but for end-users, I would consider it a massive upgrade.
One of the reasons I believe this is the addition of navigation flows. I can create my own customized tile interface for my application and assign it to a user. This means I can really create a user-specific interface tailored for a specific set of business processes. This helps me put together a pretty awesome demo and makes end-users feel like it is a more truly customized application.
But wait, there is a downside. I love navigation flows. And if your users are primarily in the web-based interface, they are amazing. If the majority of your users are in Excel however…they will totally be out of luck. Navigation flows haven’t made it over there yet. I’m not even sure if they can without a major interface overhaul.
Dashboards
While we are on the topic of the simplified interface, let’s discuss dashboards. They do exist, like the simplified interface, in 11.1.2.4, but have since been removed in 11.2. Oracle Cloud EPM has also added a variety of new visualization types:
- Combination Graphs (seriously, how is this not in on-premise)
- Funnel
- Radar
- Tile
While I believe Oracle Cloud EPM dashboards are fantastic, they do have at least one major downside. Again, they don’t work in Smart View. But, it’s a dashboard, so I’ll give Oracle a free pass.
Cloud vs Hyperion Planning Browser Support
For a very long time, Internet Explorer was it with Hyperion. Finally, Oracle finally brought Firefox into the fold. Now, with Oracle Cloud EPM, it really doesn’t matter what platform you work on. The simplified interface is fully compatible with Edge, Firefox, Chrome, and Safari. This is of particular importance given how easily I can access Oracle Cloud EPM from my phone or tablet. The interface is great on mobile devices. This is an area where dashboards can really shine. To get mobile access in Planning, I have to bribe somebody in IT to open ports on the firewall. And frankly, I don’t think any of us have enough money to afford the bribe necessary for that to happen.
Cloud vs Hyperion Planning Localization
If you haven’t done a lot of international applications, you probably don’t care about this at all. But companies with users all over the world, Oracle Cloud EPM has made life much, much better. First is the ability for Oracle Cloud EPM to automatically detect your language settings in your browser and to automatically translate everything that’s built in. Oracle has taken this a giant leap further and added something called Artifact Labels. Essentially I can add languages and labels to all of my objects now. Instead of a form being Revenue Input for all of my languages, I can now label that form in any language. This is pretty impressive compared to Planning.
Application Reporting
No, not financial reports, but reports about the application. Planning essentially provide nothing in the way of reporting. You can get a variety of information out of the repository, but that’s just painful. Oracle Cloud EPM has added a wealth of reporting options. Here’s a quick list:
- User Login Report – When and how often are users in the system?
- Form Definition Report – Great for documentation, this produces a PDF of selected forms with the entire definition in a nice set of tables. Rows, column, POV, page, business rules, etc.
- Approval Status Report – How can I tell where everyone is on their approvals? This will produce a report providing just that in a variety of formats including XLSX and HTML.
- Access Control Report – See how everyone is provisioned. It will show either explicitly assigned rights or effective rights. Pretty convenient.
- Activity Reports – Check out what your users are up to.
- Access Logs – Get the full picture of everything that happened.
- Audit Report – Finally, I don’t have to query the HSP_AUDIT_RECORDS table. I also don’t have to go to the specific cell. I can run a quick export to Excel. Not perfect, but I’ll take it.
So Long Financial Reports…Nobody Will Miss You
When the web-based Financial Reports Studio released, we were all very excited to never have a version mismatch or just general issues with the installed FR Studio. Then we actually used the web-based version and we discovered that Oracle somehow made it so much worse. That all changed last year in Oracle Cloud EPM. Financial Reports, while still available, has officially be replaced with the Management Reporting functionality found in a Narrative Reporting application. The interface is actually pretty amazing (though there are a few issues) and I actually find myself not hating the report building process any more.
Groovy Business Rules
With EPBCS and Oracle Cloud EPM Enterprise, I can now write business rules in Groovy. These rules can go far beyond the simple bounds of Essbase data. They can pull context from the application itself. I am sad that this feature has not yet and will likely not ever make it into Oracle Cloud EPM Standard. Here’s hoping.
LCM Maturity
I’ve been using LCM for a long, long time. I can’t point to specific things in LCM that are better, but I can describe LCM in Oracle Cloud EPM as more “mature.” It just feels more stable and seems to work better.
Cloud vs Hyperion Planning Documentation
I know, on-premise applications have a ton of documentation. But, there’s something to be said for easy access to what I’m looking for. There is a ton of content on the Academy and much of it is especially useful for new users. Planning for new users are basically on their own.
No Infrastructure Needs
For those of you that do infrastructure, this is not a plus. But for the rest of us, not needing to install and configure the system is just easy. I don’t have to worry about something in IT getting messed up. I don’t have to worry about applying patches. Having said that, you do lose control of your infrastructure. But hey, it’s the cloud.
No VPN Necessary
I mentioned earlier that I can finally access my Oracle Cloud EPM application with my mobile devices. The cloud makes this so much easier. Not only that, but if you need to give your consultant access to the system, it takes 5 minutes and doesn’t require hours of paperwork and begging of IT. I love not needing yet another VPN connection just to modify a form.
Free FDMEE!
Okay, so it isn’t FDMEE. But for most client, it does more than enough. And again…it is free. So stop complaining that it only loads text files.
Oracle Cloud EPM vs Hyperion Planning
Having said all of that, and it was a lot, Oracle Cloud EPM still isn’t for everyone. But as time passes and development continues for Oracle EPM Cloud while it stands still for Planning, it is becoming more and more difficult to ask the question why Oracle Cloud EPM? Instead we really have to ask why NOT Oracle EPM Cloud? And don’t forget, we get new features all the time, so be sure to check out the latest release information.


 Once we click Drill Through we should see a list of all of the valid reports for that intersection. Just like in Essbase, we can see multiple reports if multiple reports are defined:


 If the database isn’t started, you will get a dialog like this:


 That is not terribly promising. In fact, it just plainly says absolutely nothing about drill-through. It doesn’t even mention ASO at all. But hey, let’s follow the instructions and patch our system anyway. Flash forward a few minutes, or hours depending on your installation and we should be ready to try it out again: